 Posted on 08 December 2020 by Leanne.
Hey everyone! When I’m not at the library you’ll often find me working on my art. You may have already seen my blog posts on Urban Sketching. My main creative love is painting, and I’ve been doing it for over a decade. This means that I’ve learned a lot along the way.
I’ve been working on some new virtual programs to share some of this knowledge with our community!
I’ve also made a few videos about painting.
First of all, there’s a video all about art supplies, the differences between them, and what I use when I make my own work.
I also made a video that talks about colours, colour mixing, and tips and tricks that helped me when I was learning to paint.
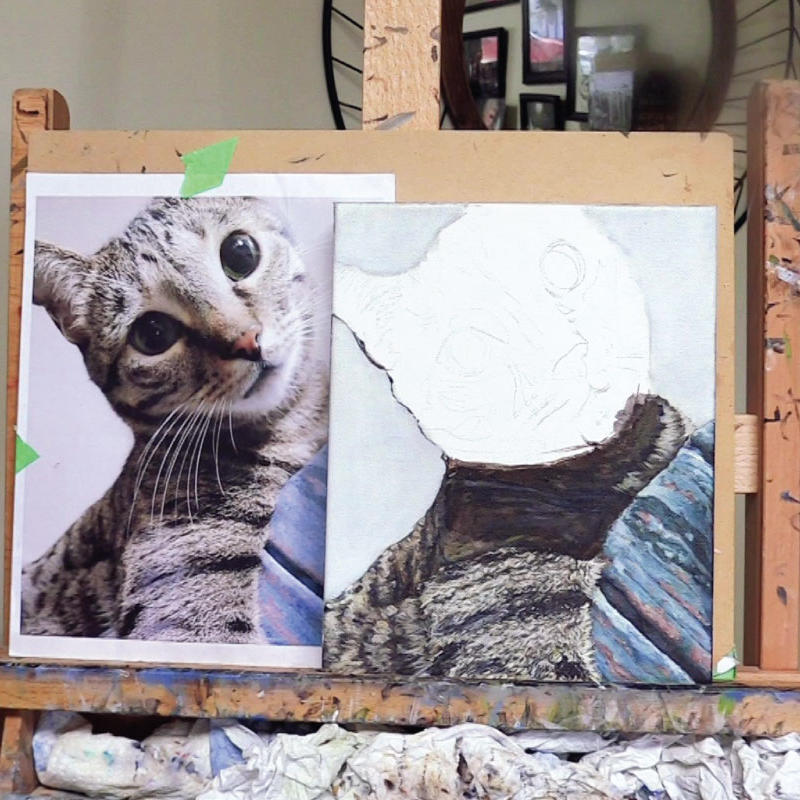
Finally, I have a video all about mixing blacks and neutral tones. At the end, you’ll see me demonstrate how I paint with my mixed colors. You’ll also be able to see how I layer acrylic paints!
Below, you’ll find a blog post about how I set up my home studio where I make all of my paintings.
THE SPACE
When you get into the world of painting and fine art, one of the first things you will need to think about is the space you will create in. Working in poor space can lead to frustration and bad art - believe me, I’ve been there.
If I’m not working at the library, chances are you’ll find me at home, painting in my studio. I’m a fine artist who has been seriously creating art for over a decade. A lot of my free time is spent making realistic acrylic paintings, so it was essential for me to set up a workable area in my home.
(Here’s an example)

Setting up my home studio took a lot of trial and error. There were definitely frustrating moments. It’s not very easy to find good information online about how you can set up a great space without spending a lot of money. I love being an artist, but I didn’t have the budget to set up a completely custom space in my home when we bought it.
Why am I making this post? Maybe you’ve checked out some of our fantastic art books and fell in love with painting, drawing, or another fine art. You want to upgrade your space at home, dedicating a space to your new creative hobby , but you don’t want to spend thousands of dollars to do it.
Especially with everything going on right now with the pandemic, I realize that a lot of people are looking for ways to save money. I wanted to pass on what I’ve done, along with some tips and products I use, in the hope that it will help others in the community.
LIGHTING
The most important thing with any studio space is the lighting. Good, consistent light is essential to making any kind of art. It’s even more important if you make realistic art like I do.
The choices you make in your lighting affect your ability to match colours accurately, judge skin tones, and even feel happier by the quality of light you’re painting in!
At first, trying to understand ALL THE THINGS that went into lighting my studio led to some stress. What kind of bulb? How much light? What can I use?
How strong is the light coming into your studio? Where is it from?
I live in a bilevel house. My studio, which is a bedroom in the basement, has a large window that lets in a lot of natural light. It’s a south-facing window. This means that the light that comes in is very different as the day progresses. It’s not great. Chances are, a lot of you don’t have ideal lighting either.
I also paint a lot at night, after the sun goes down. I knew that I needed to find an artificial lighting solution that would consistently light my space at any time of the day. It had to be bright, but not too bright.
Color Temperature
As a fine artist, this is one of the most important factors you need to consider when you set up a studio space. Just as paint colors can be warm and cold, so are different light sources. This affects how you perceive colors in your studio.
Color temperature is measured in Kelvins (K). The higher you go on the Kelvin scale, the more blue the light is. Here’s a really helpful diagram:

A lot of people light their homes with bulbs that are in the 2,000-4,000K range. As you can see from the diagram, it’s on the yellow side.
When you’re making art, it’s ideal to have light that’s as white as possible. The best color temperature to use in your studio is in the 5000k range. This means the light looks white, without having a yellow or blue tint to it.

Here’s a great example of what I mean! I took this picture at night in the hallway. The walls are all painted the same color. The light overhead is a typical bulb - it’s around 2,000K. Through the doorway, you can see my studio light. Do you notice how white it looks compared to the light in the hallway?
The last piece of the puzzle - Color Rendering Index (CRI)
Color rendering index refers to the ability of the light bulb to illuminate color accurately.
Natural daylight has a CRI of 100. When you’re choosing lights for your studio, you want to find a bulb that’s as close to this as possible. Most light bulbs you’ll find at places like Home Depot or Rona have a CRI between 80-90. This is workable, but if you want to make realistic art, it can be frustrating.
When I first set up my home studio, I used fluorescent light bulbs from Home Depot. They were 5000K, but any greys I painted that I thought looked perfect at night would look purple the next day when light was coming in the window. It was so frustrating! Then, I looked at the information on the light bulbs and saw they only had a CRI of 80. That’s why the greys looked different at night compared to when the sun was shining in the window.
Lumens
Another important part about lighting your studio space is how much light you need. The brightness of a light is measured in lumens. The more lumens, the brighter the bulb.
Here’s another great diagram that talks about this:

There’s no “one size fits all” solution for how much light you need. For those who draw at their desk, a lamp with two LED light bulbs will be more than enough light. If you’re like me, you may have a fluorescent lighting ballast that gives off 8000 lumens.
HOW DID I DECIDE WHAT TO USE?
After I wrapped my head around what I needed to look for in a light, and looked at the bedroom, I knew I needed to change the light fixture. The old fixture only held 2 bulbs. It wouldn't be bright enough. I’d have to change the light fixture.
From past experience and classes I’d taken before, I also knew that fluorescent lights worked really well to light a painting area.
I also didn’t have a lot of money to spend. After looking around, I decided to install a 4-light fluorescent lighting fixture by Lithonia. It was around $90.

To install this in my home, we disconnected the existing light fixture and wired this in, then mounted it to the ceiling. It’s pretty light and there’s some good YouTube tutorials out there. If you don’t feel comfortable doing this, an electrician can quickly change the light out as well.

I realize that not everybody can change their light fixtures because they rent. Sometimes, you can negotiate with your landlord, on the condition that you’ll change it back when you move out.
You can also buy a few really nice, bright 5000K LED or halogen bulbs and put them in your lighting fixture. Then, if you need more light, you can also buy a floor lamp and use that as well. There’s some really nice floor lamps out there for under $100. Here’s a great example that shows what I mean. This would be a great solution if you’re renting an apartment, for example!

LIGHT BULBS
I use these fantastic fluorescent T8 bulbs by Standard. Once I realized that the lights from the hardware store didn’t have a high enough color rendering index, I reached out to Trico Lighting to see if they could order me a better bulb.
They were super helpful. I ordered these bulbs by Standard and I’ve used them ever since. I recommend them to anybody that’s looking for great studio light. The CRI is almost identical to daylight. After I installed these bad boys, I never painted an accidental purple-toned grey again!

Fun fact - they’re actually used by print shops to proof things.
Each bulb was $16.99 plus GST. This means I paid around $70 for four bulbs. Even though it’s a bit pricey, these bulbs will last for years without a problem. As of the day I’m writing this, I’ve been using these bulbs for three years and they are still going strong.
Check out the label below.

The Lighting Total
The combined cost of my light fixture and bulbs clocks in at just under $200.
EASLES, PAINT, STORAGE
Whew! With the hardest part out of the way, I also wanted to talk about what I use in the rest of my studio setup.
Easels, desks, etc.

If you paint a lot, like I do, this is another important purchase. Do you prefer to sit? Stand? Do you want to travel with your easel, or will it stay in the studio?
Michaels has a really good selection. They have a variety of easels and art desks for different price points.
I always stand when I’m painting. I wanted to invest in a sturdy easel that would hold up a variety of canvas sizes. Their Studio H Frame Easel is a really great product. I’ve used mine for years.
Michaels often has sales on their art desks and easels. This one normally retails for $250, but I got this for $160 through a 45% off sale.
Tip: Always use a coupon at Michaels! They usually have a 30-45% off coupon every week. Look at their weekly ad or check the app.
Storage

I’ve accumulated a lot of supplies over the years. I have a storage bin in my closet, but I wanted something smaller to put by my easel to put my most used items in. It also needed to be high enough to hold my water glass, palette, and brushes. I also didn’t want to spend a lot of money on it since it would inevitably get covered in paint.
I found a good solution at Micheals with a rolling art/paper storage cart. It cost me $55 after using a 40% off coupon. It’s been used for three years now and still going strong!
They sell a variety of these. I don’t know if they still sell the model I have, but here’s a similar one.
THE GRAND TOTAL
So, how much did it cost me to set up my workable home studio space?
$380
I hope you found this blog post helpful and learned a thing or two about how you can have an easier time creating art at home! You really don’t need to spend thousands of dollars, or rent a dedicated studio space, to make your own art area at home.
Sources
https://willkempartschool.com/art-studio-lighting-design/
http://www.stanprokopenko.com/blog/2009/03/setup-painting-studio/