 Posted on 16 April 2020 by Leanne.
Spring has sprung and we all will be spending more time at home for the next while. At MHPL, we know the future is uncertain and scary. While we can’t predict how the new few weeks are going to go, we’ll try and make the time at home easier by providing you with some blogs and videos of crafts you can do at home to pass the time!
Today, I wanted to introduce you to a fun way to organize your life - Bullet Journaling!
What is it?
Bullet Journaling is a method of organization that was developed by Ryder Carroll. It organizes schedules, reminders, to-do lists, brainstorming, and other organizational tasks into a single notebook.
Here’s the fantastic, short video introduction to what bullet journaling is and how it’s organized.
The Basics
Rapid logging is the language that bullet journals are written in. It’s a way of capturing information as a bulleted list.

Bullets
- Bullets are short sentences that are paired with symbols to visually categorize your entries into Tasks, Events, or Notes.
.png)
Tasks are Represented by a Simple “•”
- You use a dot instead of a checkbox because it’s fast and can be easily transformed into another symbol.
- They can mean one of these:
.png)
Events
- Represented by the open circle “O” bullet.
- These are date related entries that can be scheduled, like a birthday. Or they can be logged after they occured, like “signed doctor’s form.”
- These should be kept short and objective.
.png)
Notes
- Represented with a dash “-”
- Include facts, ideas, thoughts, and observations.
- These are used to capture information you don’t want to forget.
- This type of bullet works well for classroom, lecture, or meeting notes.
.png)
Mixing and matching these three types of bullets will help you quickly categorize everything you need to remember as you go throughout your day. You don’t need to worry about putting them in a certain order! The most important thing is to get the information out of your head and onto paper. Here’s an example:
.png)
Nesting
- Nesting bullets can add some much-needed variety to your entries.
- For example, you can put notes under an event to record specific details you need to remember about the event.
- You can put subtasks under regular tasks to break it down into more steps.
.png)
Signifiers
- These are symbols that give your entries additional context at a glance.
- They’re placed to the left of bullets, so they stick out. It makes them easy to spot when you scan your page.
- An example: * can mean priority and be used to mark the most important things in your list.
.png)
Put it Together
To put these concepts together onto a page, you first need to give your page a topic, or title. It clarifies what your page is about and the kind of content it contains.
Once that’s done, you need to number the page. You use page numbers to locate content as you add to your journal.
This is the minimalist example of the Daily Log, which is the main kind of entry, or “collection” that’s used in Bullet Journaling.
.png)
Collections
Think of bullet journaling as a modular system. Each part, or Collection, organizes related information. You mix, match, and customize these to suit your needs.
There’s four core collections. They are the Index, Future Log, Monthly Log, and Daily Log.
The Index
Located at the front of your notebook, think of this as the table of contents for your entire bullet journal. You add topics and page numbers to this page so you can find them easily later.
Collections that span a series of pages are written down like “Collection: 5-10”
If you have a repeating collection, like a mood tracker, you can enter it like “Mood Tracker: 5, 7, 10”
The first picture here is an example of an index, the second photo is of the index in my own personal bullet journal!
.png)

The Future Log
This collection is used to store entries that will occur outside the current month. There’s many creative ways to set up this group of pages. It’s an easy way to look into the future you’re actively working towards.
Each month, you should look at your future log. See if there’s anything in there that should be moved to the current month you are setting up.
These photos show a simple example and again, an example from my own bullet journal.
.png)

The Monthly Log
Think of this as the month in review in a normal day planner. It consists of a calendar page and a task page.
The calendar page provides a birdseye view of the month. You can schedule events and tasks in it, record events after they happen, or both.
The task page is designed to help you take a monthly mental inventory. It’ll let you know what the priorities for the month are, what needs to be finished from last month, and what matters now.
I like to change my theme up each month - here's a photo of my cat-themed March.
.png)

The Daily Log
This spread is designed for day-to-day use. You record the date as your topic at the top. Then, you rapid log, using the different styles of bullets, as your day goes on. If you don’t fill a page, add the next date wherever you let off and you’re ready to continue.
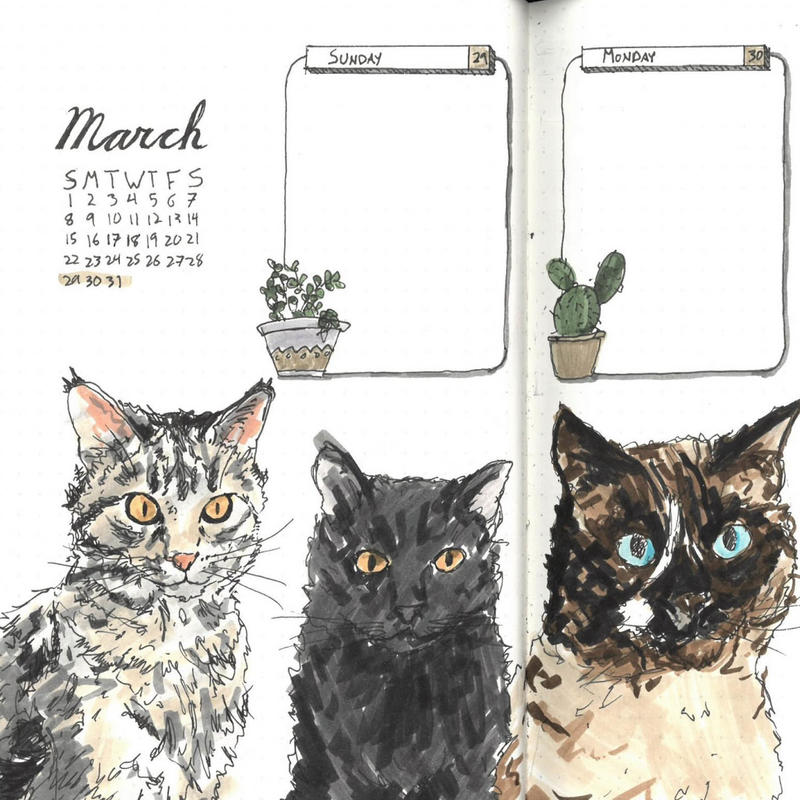
Here's a photo of what my March theme looked like in my daily log - I liked having fun with how it looked. Since I needed to fill some space up at the end of the month, I doodled my cats.
.png)

Custom Collections
These pages are meant to help you keep track of whatever you need to track - be it fitness, chores, habits, spending, etc.
.png)
What's Migration?
Monthly migration helps us weed out distractions in our everyday lives.
At the end of the current month, you need to set up the next month. This involves looking back at the past month and reviewing what you wrote down in your bullet journal. Most people don’t complete all the tasks they write down in a month, which is fine! Reviewing what happened helps you figure out which incomplete tasks you should move into the next month, and which ones you should strike out and forget about.
To migrate a task, you turn the “•” into “>”. This shows that you’ve moved the task over into the new month.
For example, if you wrote a book to read, you would migrate it from your daily entry into a collection page called “Books to Read.”
The effort it takes to write and re-write these tasks is intentional. It’s meant to make you pause and reconsider each item. If the entry isn’t worth the effort to re-write it and move it, it’s probably not worth your time. Migration allows you to consider what’s worth the effort.
This was a very basic introduction to the Bullet Journaling system! If you’d like to give it a try, don’t be too hard on yourself to get it “perfect” right away. I’ve been working on it for a few months now and still make mistakes.
Conclusion
Your bullet journal can be as minimalistic, or as artistic, as you’d like it to be. So, grab a notebook lying around the house, a pen, and give it a try!
Stay tuned for part two, where I’ll talk about some great products and supplies you can use for your own bullet journal!
Note: Several of the images in this post were sourced from here.