 Posted on 23 July 2020 by Leanne.
Now that you know the basics of sketching things… what’s next? You’ll find your own way to draw the world around you. There’s countless ways and styles to sketch. This post will be all about inspiration. I’ve included some art that I really like, and I hope you like it too.
.png)
Let’s get started!
(1).png)
I love how loose this sketch is and the fun use of color.
.png)
This is a really great example of using sketching to figure out architectural details.
.png)
.png)
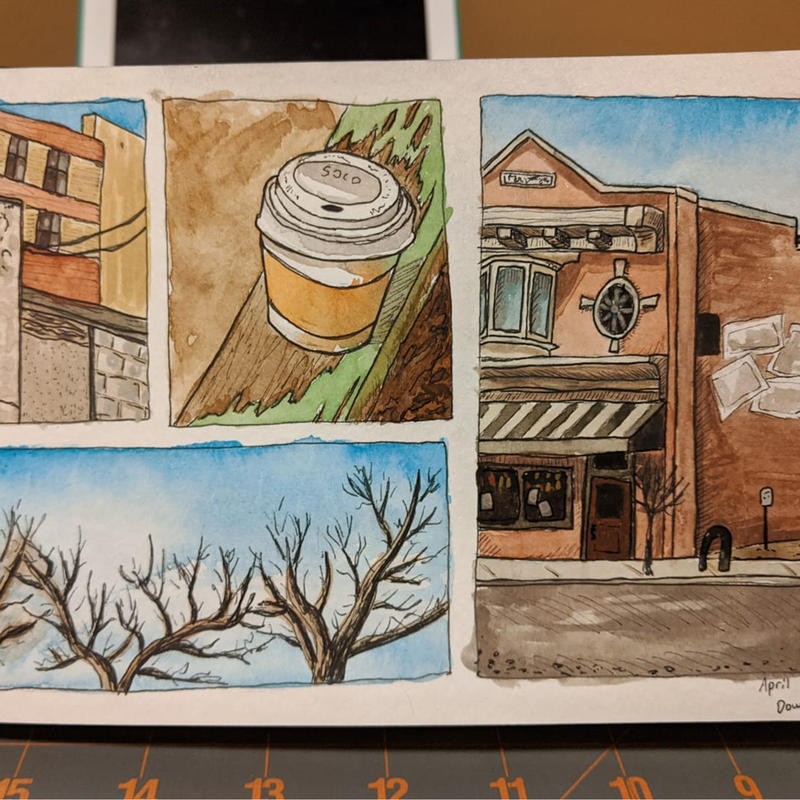
These are two very different styles, but I love how the bridge yellows, reds, and blues were used to draw attention to each of the stores.
The following sketches are all very lovely in their own ways. Some are simple, some use pops of color, while others look more complicated. You can see the wide range of styles. It’s really true - no two urban sketches are alike.
.png)
.png)
.png)
.png)
.png)
.png)
.png)
.png)
.png)
.png)
.png)
.png)
.png)
.png)
.png)
Trees
When you’re just starting out, trees can be difficult to figure out. They look so simple right away, but it can be tempting to try and draw every leaf, every color, and end up with an overworked sketch. I still struggle with drawing trees - bare and with leaves. I hope you find these examples as helpful as I do!
.png)
.png)
I really love how using a few “blobs” of watercolor can add such detail to a cityscape! Leaving the rest of the drawing unshaded is also a great way to add emphasis to the trees.
.png)
.png)
.png)
.png)
Each kind of tree is unique. You won’t want to draw a pine tree the same way you would draw a cedar tree. Paying attention to what makes each tree different will be really helpful on your art journey.
.png)
.png)
.png)
Tree branches can also be very complex to draw or paint. You normally won’t want to try and get every single branch in your composition because it’ll make it look too busy. This artist did a really great job of including just enough branches to suggest how big this tree is.
.png)
.png)
.png)
.png)
You can also make some really neat looking trees with a few pen scribbles and dabs of watercolor.
Buildings
If you’re getting into urban sketching, you know that you’ll wind up drawing a building sooner or later. They can be very simple, or very complex. Here’s some cool ways that other artists have chosen to portray them.
.png)
.png)
.png)
.png)
.png)
.png)
.png)
.png)
.png)
.png)
.png)
.png)
Landscapes
If you live in the Medicine Hat area, you’ll also have a lot of chances to draw the prairie scenery that surrounds our community. Instead of trying to add every detail that you see, you can have a lot of fun by focusing on a few objects instead.
.png)
.png)
.png)
.png)
.png)


This is a great example of simplifying what’s in front of you. The artist chose to use a few strokes of blue watercolor instead of trying to capture every ripple in the river. They also used some solid blocks of color instead of including every blade of grass.


I enjoyed the style in this sketch. It’s pretty fun and feels like a children’s novel, but you can still tell it’s a city park.
.png)
.png)
.png)
.png)
People
Including people can be one of the most intimidating parts of sketching in public. This section shows how people can be included in a sketch in a variety of styles. It shows that you can make some fun drawings by relaxing, having fun, and not worrying about the person being anatomically correct.
.png)
.png)
.png)
.png)
.png)
.png)
.png)
.png)


.png)
.png)
.png)
.png)
.png)
.png)
.png)
How Do You Learn To Draw Loose and Free?
.png)
Urban Sketching can look very loose and stylized. Beginners can feel frustrated that their drawings don’t look as confident as others who have been practicing for a while.
The biggest thing you need to remember when you start sketching is that you should never force yourself to use a certain style. I say this a lot, but it’s true. Your individual style will develop as you practice a lot and get comfortable with the basic concepts of sketching from life. You get to the point where you are confident enough to move your pen without getting bogged down by everything you are seeing. You feel it instead.
If you look at drawings I made 10 years ago, you can see that my style was there, but it needed a lot more work to develop.
.png)
This was one of the first sketches I tried to make. I’m fairly comfortable with basic drawing concepts, but I would overwork what I was trying to draw. I had also never used watercolor before, didn’t have the right pens, and worried way too much about making things perfect. This house is accurate, but… I could tell it wasn’t loose, free, or fast. Don’t get me wrong, it’s great for just starting out! I struggled a lot with perfectionism in the first few years I sketched.
.png)
Here’s a sketch I finished this year, from the information desk at the library. If you look, you can see that my drawing “style” is still there, but it’s more confident and loose. I’m also a lot better with watercolor and not being such a perfectionist.
Things to Remember
- Draw, draw, draw! The more you draw, the better you get.
- Sketch everyday things around you… even your feet.
- Don’t erase mistakes. Embrace them instead.
- Date your sketches and sketchbooks. It helps you keep track of your progress.
- Add thoughts to a sketch.
- Always carry some drawing materials with you, even if it’s a pencil and a mini notebook in your purse.
- Drawing for short amounts every day is ALWAYS better than drawing a few times a month for a longer period.
Local Urban Sketching Groups
Did you know that Calgary has an urban sketching group? Here’s a few great drawings that their artists have made.
.png)
.png)
.png)
Medicine Hat Urban Sketchers
I wanted to promote our local Urban Sketching group one last time. You can find us on Facebook and Instagram. They meet at least once a month and sketch somewhere in the community. If you’re feeling nervous about sketching out in public by yourself, join the group. You can make a post saying that you’d like to sketch with others and let them know when you’re available. Other members will reply and you can figure out a time to meet.
.png)
Final Things To Remember
Thank you for sticking with my blog series until the very end. I hope you learned some new skills, felt inspired, and most importantly, had fun. Here are a few final thoughts I’d like you to remember as you go on to practice sketching on your own:
- You don’t need to share your sketches until you’re ready to.
- Drawing bits of things is less intimidating, like drawing ears instead of the entire head.
- A little bit of perspective knowledge goes a long way.
- Simplify your drawings and be okay with wonkiness.
- Seek out and share inspiration with others.
- If you feel like something is “too hard” to draw, try it anyway.
- Don’t give up!
***
There’s many places you can look online to find inspiration. These include the official Urban Sketchers blog, Flickr, Facebook, and Instagram pages.
Thank you for participating in this five-part blog series on urban sketching! We’d love to see what art you come up with, so please share them with MHPL on our Facebook, Instagram, or Twitter pages. If you have any questions, feel free to email me at [email protected].